




This KTM 1290 Super Duke R 2013-2016 vector template reproduces the KTM 1290 Super Duke R 2013-2016 at real scale (1:1) as an editable vector file.
Table of Contents
KTM 1290 Super Duke R 2013-2016 Vector Template: Overview
Use this KTM 1290 Super Duke R 2013-2016 vector template as an accurate base for decal kits, vinyl wraps, custom liveries and other graphics on the KTM 1290 Super Duke R 2013-2016. It is made for graphic designers, wrap installers and sticker manufacturers.
The KTM 1290 Super Duke R 2013-2016 template is made for the first generation of the naked V-twin that KTM nicknamed the Beast. Our outlines follow its body panels at real 1:1 scale, so a livery, a wrap or a set of custom stickers can start from true shapes instead of a rough guess taken from a photograph.
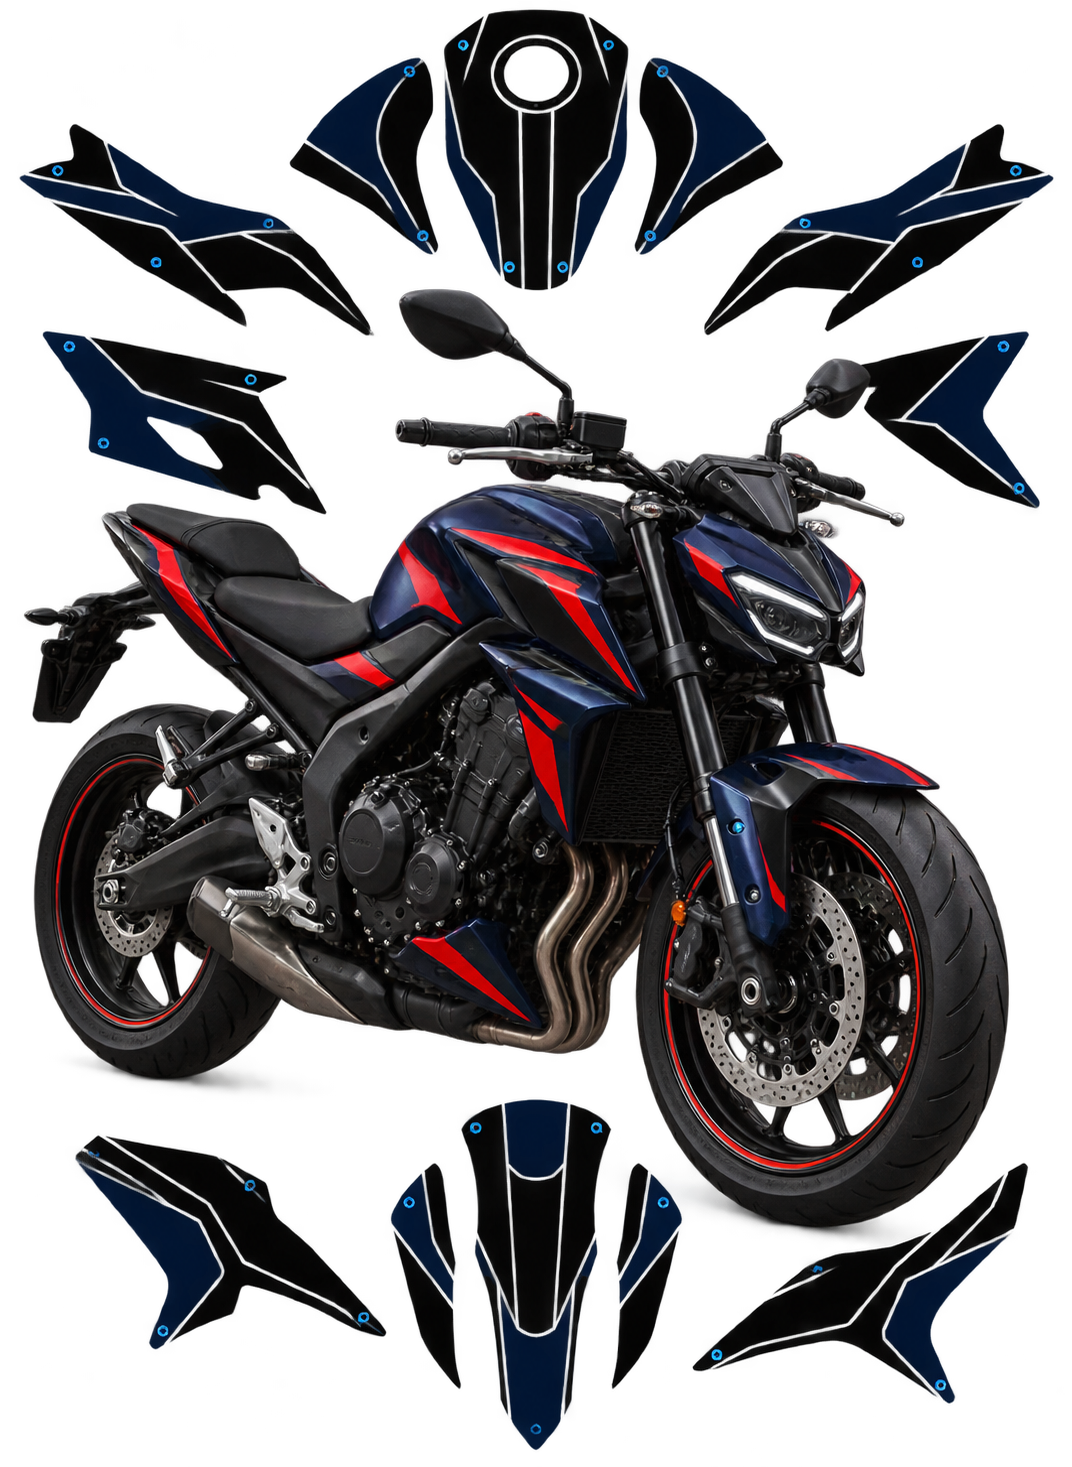
Each file contains editable vector contours of the body panels at real 1:1 scale, in AI, PDF and CorelDRAW formats, with layers grouped by part. It is a starting point for your own design, not a finished artwork ready to print. Designers, wrap installers and sticker makers work from it.
A naked bike shows its plastics without a big fairing to share the attention, so every shroud, cowl and fender is on display. That makes accuracy matter: a decal that sits a few millimetres off a crease is visible from across the road. A true outline removes most of that risk before you cut anything.
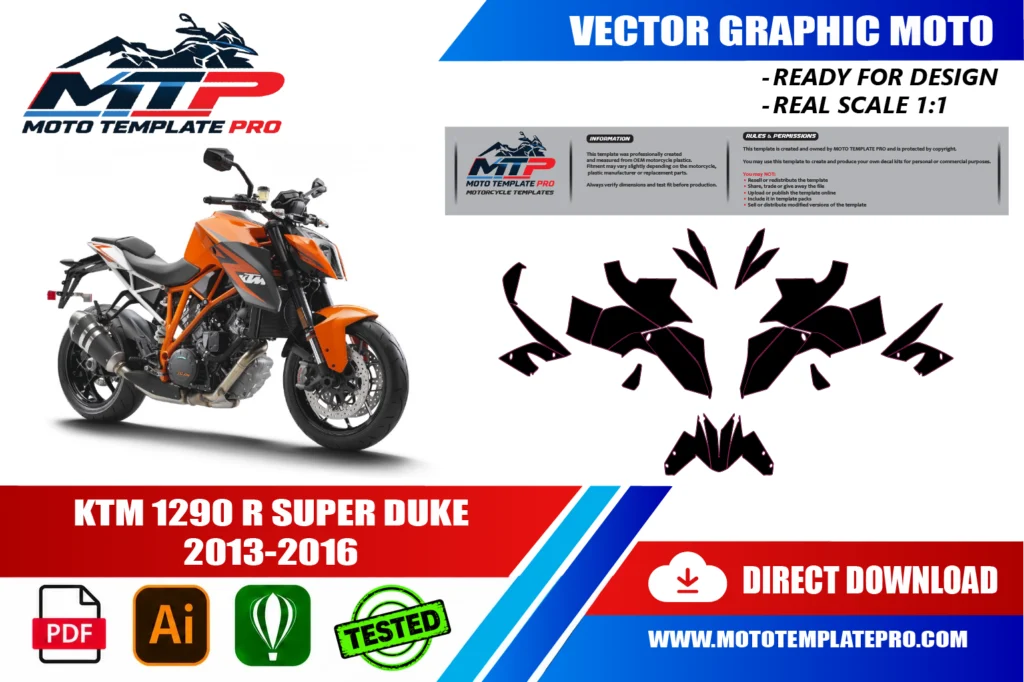
The template is provided as an editable vector file, compatible with Adobe Illustrator, PDF and CorelDRAW. It is a starting point for your own design work rather than a finished, ready-to-print graphic: a precise outline of the panels that you can use to position decals, plan a wrap layout or prepare a sticker kit at the correct scale. For background on why vector files are the standard for wrap and decal production, see the Adobe comparison of raster and vector formats.
The Beast arrives: where the KTM 1290 Super Duke R 2013-2016 sits in the line
KTM unveiled the 1290 Super Duke R at the end of 2013 as the flagship of its Duke family, with a 1,301 cc LC8 V-twin, a steel trellis frame painted orange and a sharp, angular look. The KTM 1290 Super Duke R 2013-2016 template covers this first generation as a family, from the first bikes through the following model years.
Why the first generation looks different from later ones
KTM later renewed the bike with different styling, so a Super Duke R from after this period should not be assumed to share these outlines. Our product pages for later generations are separate. If you are looking at a used bike, the shape of the headlight and the tank shrouds is the quickest way to tell the generations apart.
We did not verify the year-by-year differences inside 2013 to 2016, and we know that KTM changes colours, trims and equipment between seasons. Treat the period as one body family with several colour schemes, and compare your own machine with the product description. Details differ by year and market.
Owners of second-hand bikes should also ask whether panels were replaced after a fall, because replacement parts can differ slightly in fit and finish.
Before ordering, note the gap between a bike you saw in a showroom and the one in your garage. Owners of this model often fit aftermarket mirrors, tail tidies, fly screens or radiator guards, and those parts can cross panel edges that the factory design leaves open. List what is fitted on your bike, and decide whether your graphic should stop short of it or tuck underneath.
Naked by design: the panels of the KTM 1290 Super Duke R 2013-2016
With no full fairing, the plastics of this bike are a collection of separate pieces. Each one has its own purpose, and each one can carry a different part of your design. Seen from the front, the headlight cowl frames the lights, while the front fender sits low over the wheel.
- Headlight cowl and mask: the face of the bike, where logos and eyes of a design often start.
- Tank shrouds: the large side pieces that wrap the fuel tank area and carry most of the livery.
- Side panels and airbox covers: smaller flanks between the tank and the seat.
- Tail section: the short rear unit under the seat, usually a good place for a name or number.
- Front and rear mudguards: narrow strips that tie the front and the back together.
Read the product description for the exact list of parts that are drawn. Because the layers are grouped by part, you can switch off everything but the left shroud and focus on it without moving anything else.
Photograph each panel straight on, with a ruler beside it, and compare it with the outline before designing. This reveals holes, vents and fastener points that sit in a different place on your bike than you expected.
Tank shrouds as the main canvas of the KTM 1290 Super Duke R 2013-2016
On this bike the shrouds are the largest continuous surface a designer can work with. They flow from the steering head back towards the rider’s knees, with ridges and creases that catch light. A graphic that follows those creases looks as if it belongs to the bike; one that ignores them looks stuck on.
Use the outline to find where a crease runs and place a colour break exactly there. A hard edge on a crease is almost invisible as an edge, while the same line placed a few millimetres away draws the eye. Test with a paper print before committing the film.
Remember the rider’s knees. The inner edge of each shroud rubs against clothing and boots, and a pale film there will scuff first. Keep decorative detail away from that contact area and use a tougher, darker tone.
Also consider the fuel filler and the way a cap hinges or lifts. Artwork should stop cleanly before it, not run under it, so that refuelling never tears the film.
Finally, work left and right as separate files. Even a symmetrical-looking tank has small differences, and a lazy mirror copy can place a logo awkwardly near a fastener on one side.
Headlight mask, tail and fender: small surfaces on the KTM 1290 Super Duke R 2013-2016
Small parts reward restraint. The headlight area is full of lenses, edges and fixing points, so decorate it with thin lines and keep any film away from lenses. Do not cover indicators or reflectors, and do not tint a lens without checking local rules.
The tail section is the best place for a name, a number or a small brand mark. It is seen from behind in traffic and in photographs, and its flat areas make clean lettering easy. Leave space around the number plate bracket and the rear light, and check where the passenger seat cover meets the panel.
On the front fender, a stripe that continues from the shroud ties the whole bike together. Make sure the stripe lines up where the fender ends and the fork begins, because a gap in that line shows from the side.
On a bike with a short tail, one large element is more effective than several tiny ones. Choose it early and let the rest of the design support it, instead of competing with it.
Sticker makers sometimes ask whether to work in small units or large ones. On a bike with several separate plastics, small units are easier to apply and to replace, but large units give a cleaner look. A good compromise is one large piece per shroud and one for the tail, with small accents elsewhere, so a scratch never forces a full reprint.
Livery ideas for the KTM 1290 Super Duke R 2013-2016
This is a bike with attitude, so the livery can be bold. The orange frame is a strong visual anchor, and many owners build around it rather than fight it.
Directions to try
- Track-day numbers: a clean number box on the front cowl and tail, with white or yellow ground for readability.
- Stealth black: matt black film on the shrouds, with a single thin orange line that echoes the frame.
- Retro stripes: long parallel stripes in a heritage palette, running from the headlight to the tail.
- Club colours: a two-colour split along the shroud crease, with a small crest on the tail.
Decide early whether the film covers the factory colour or sits on top of it, since a half-covered orange panel rarely looks planned. Mirror artwork deliberately for left and right, and test fluorescent films outdoors before printing the full kit.
Think about the bike from the saddle as well: the rider looks down at the top of the tank and the inner edge of the shrouds, so small details placed there are for the owner alone.
Think about the bike in motion too. Seen at road speed, a detailed design blurs into a smudge: simple shapes, strong contrasts and large letters stay readable as the bike passes, while hairline details vanish. Imagine your design from ten metres away before you approve the proof.
From vector outline to cut file for the KTM 1290 Super Duke R 2013-2016
Open the file and start by hiding the layers you do not need. The outlines for the KTM 1290 Super Duke R 2013-2016 are grouped by part, so you can build one panel without disturbing another. Rename layers clearly, such as left shroud or tail, and lock each one once its artwork is final.
Draw your artwork larger than the contour, then trim it back. A bleed of about 3 to 5 mm gives the cutter or printer room and covers small positioning errors. Keep text and logos inside a safe zone, away from edges, screws and cut-outs, and add registration marks if a long panel is printed in sections.
Keep colour work tidy. Follow the profile your print shop supplies, often CMYK, and reserve one spot colour for cut lines only. Export three versions: a layered master, a cut-lines-only file for the plotter and a flattened proof for the customer.
Before buying film, measure a known distance on the artboard and compare it with the real panel. Print a paper test at actual size, tape it to the bike and look from several angles. On a naked bike every panel is visible, so this ten-minute check is worth doing.
When the design is final, save a clean master with named layers. If a panel is scratched later, you can reprint exactly that piece without redrawing.
Keep a log of the layers you have changed since the last export. A short list of edits, such as a moved logo or a new number, saves a surprising amount of time when you return to the project after a week of other jobs.
Heat, wind and edges: vinyl advice for the KTM 1290 Super Duke R 2013-2016
A naked bike takes the wind head-on, and fast road riding tries to lift any edge it can find. Seal edges by wrapping them around the rim of the panel where the shape allows, and avoid ending a film on a sharp outward edge. A rounded return holds much better than a straight cut.
Heat is the second enemy. The area close to the radiator and the engine warms up in traffic, so use a film and laminate rated for the temperatures you expect, and keep adhesive-backed pieces away from exhaust hardware. Never apply film to a hot panel.
- Skipping the paper test at real size
- Printing without bleed and leaving thin white gaps
- Ending film on a sharp outward edge
- Covering lenses or reflectors
- Forgetting that the left and right shrouds need their own artwork
Clean with isopropyl alcohol, avoid silicone products and apply from the centre outwards with a squeegee. Use gentle heat only where the film must stretch around a radius, and give the adhesive a full day before the first wash.
KTM is a trademark of its owner. This template is an independent drawing aid, not an official or approved file.
One last habit: label the printed test sheets with the layer name and the date, and keep them. Months later, when the film has faded or a panel is replaced, the old sheet is a direct record of what was applied and where, and it shows whether the new print matches the old one.
How This Template Is Built
This KTM 1290 Super Duke R 2013-2016 vector template is rebuilt as a fully editable vector outline from the real panel proportions of the KTM 1290 Super Duke R 2013-2016, rather than a rough tracing or a stretched photo. Working at true 1:1 scale means printers and installers can output panels straight from the file without rescaling, which keeps stripes, sponsor logos and pinstripes aligned exactly where they were designed.
Because the panel outlines are kept as separate, editable shapes, you can turn individual sections on or off while you design and export only the panels you actually need for production. On a vehicle of this kind (naked or roadster motorcycle), the typical panel groups include the headlight cowl, tank shrouds and covers, side panels, front fender and tail section. Before printing, always measure a panel on the real vehicle against the file, since small production differences can happen and a quick check avoids a costly reprint.
What You Can Use This Template For
- Naked bike decal kits
- Tank and shroud graphics
- Tail and side panel designs
- Full or partial vinyl wrap layouts
- Custom liveries
This KTM 1290 Super Duke R 2013-2016 vector template suits riders and decal shops planning a tank, shroud and tail graphics kit, wrap shops quoting jobs sight-unseen, and sticker manufacturers who need a reliable base file instead of starting from photographs. Because the panel outlines are separated rather than merged into one flattened shape, you can isolate a single panel and export only what you need, which saves time when a project only touches part of the vehicle.

Files Included and How to Use Them
After purchase you get an instant digital download of the KTM 1290 Super Duke R 2013-2016 vector template in three formats. A typical workflow takes only a few steps:
- Download the file from your account or order email right after payment.
- Open the AI, PDF or CorelDRAW version in your vector software.
- Hide the panels you do not need and place your graphics, logos and colors on the rest.
- Print one test panel at 1:1 and check it against the real vehicle.
- Export the final artwork for your printer or cutter.
Printing, Scale and File Notes
Before you print this KTM 1290 Super Duke R 2013-2016 vector template, remember that it is built at real 1:1 scale, so the safest workflow is to print a single test panel first and lay it against the actual KTM 1290 Super Duke R 2013-2016 before committing to a full print run. A short test print is cheap insurance against a wasted roll of vinyl, especially around curved sections.
The vector layers are grouped by panel, which keeps the file manageable if you only need a subset of the panels, useful for a partial wrap, a single panel graphic or a small decal pack. If you run into a fitment question that is not covered here, reach out before you print. We would rather answer a quick question in advance than have you reprint a panel.

Also in our catalog: KTM Duke 125 200 390 2011-2016 Vector Template, KTM Duke 690 2012-2020 Vector Template, KTM Super Duke 990 990R 2005-2016 Vector Template, KTM Super Duke 1290 2017-2018 Vector Template, KTM 390 DUKE 2024-2026 Vector Template, AF Plantilla KTM Duke 250 2024 Vector Template.
Browse all KTM vector templates.
Moto Template Pro is an independent design resource and is not affiliated with, endorsed by, or sponsored by KTM or any manufacturer.
Which model years does this KTM 1290 Super Duke R 2013-2016 vector template cover?
This template is built specifically for the KTM 1290 Super Duke R 2013-2016.
Is the KTM 1290 Super Duke R 2013-2016 template the same as the later Super Duke R?
No. KTM renewed the bike with different styling after this period, so later generations have their own outlines. This template covers the first generation. If you are unsure, compare the headlight and the tank shrouds of your bike with the product pictures before ordering.
What files do I receive with the KTM 1290 Super Duke R 2013-2016 template?
You receive AI, PDF and CorelDRAW files with vector outlines at real 1:1 scale, layered by part. Open them in any vector program and keep the scale at 100 percent. They are outlines for your own design, not a printed kit and not a finished artwork.
Can I decorate the headlight area of a KTM 1290 Super Duke R 2013-2016?
Yes, with thin lines and accents around the cowl, but keep film away from lenses, indicators and reflectors. Check your local rules before tinting anything. Use the outline to find where lens edges and fixing points sit, and test the pattern on paper first.
Which vinyl lasts best on the shrouds of a naked V-twin?
Cast vinyl follows the curves and creases, and a UV-resistant overlaminate protects it. Satin hides fine scratches better than gloss. Seal edges where the shape allows, and avoid ending film on a sharp outward edge, where the wind will lift it.
How do I use the template for a track-day livery?
Build a number box on the front cowl and tail, with a high-contrast background and generous margins. Check your event rules for size and colour. Print a paper test at actual size, tape it to the bike and view it from the distance of a marshal.
Is this template compatible with other models?
No. Each model and generation has different bodywork, so this template is specific to this platform and differs from every other template in our catalog.
What file formats are included?
The template is provided in Adobe Illustrator, PDF and CorelDRAW, all as editable vector layers rather than a flattened image.
How is the file delivered?
As an instant digital download available immediately after purchase, with no physical items shipped and no waiting on a production schedule.
Is this an official KTM product?
No. Moto Template Pro is an independent business, not affiliated with KTM.
KTM 250 350 Freeride 2013-2021 Vector Template
KTM 390 Duke 2024-2026 Vector Template

KTM 890 SMT 2023-2024 Vector Template

KTM 990 Duke R 2024-2026 Vector Template


Reviews
There are no reviews yet.